The Wedding of Robert Lockhart and Tina Watson
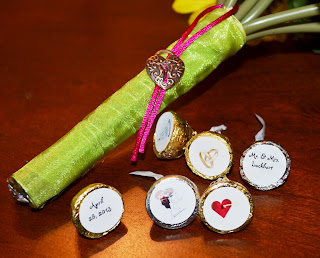
On Sunday, April 28, 2013, I had the distinct honor of officiating the wedding ceremony of my brother, Robert to his sweet bride, Ms. Tina Watson. After 19 years together, circumstances finally allowed them to fulfill their dream of becoming husband and wife. John, Sirius and I had one week to put together this little ceremony. The bride and groom were expecting to simply exchange vows, say "I do", and kiss in public...we surprised them with this little wedding. They were truly suprised, and all smiles the enitre day. I am supremely happy for the two of them.
On Sunday, April 28, 2013, I had the distinct honor of officiating the wedding ceremony of my brother, Robert to his sweet bride, Ms. Tina Watson. After 19 years together, circumstances finally allowed them to fulfill their dream of becoming husband and wife. John, Sirius and I had one week to put together this little ceremony. The bride and groom were expecting to simply exchange vows, say "I do", and kiss in public...we surprised them with this little wedding. They were truly suprised, and all smiles the enitre day. I am supremely happy for the two of them.
"Happy Day" altar
Exchanging vows
Vows and cake with "Just Married" bunting
Cutting the cake
Fun with cake!!
Catering by Sirius - Ribs, chicken, sausage. Baked macaroni and Bushes bourbon and brown sugar beans.
Kisses and flowers
Boquet and vows
Mom and Rick were able to join us via Skype!!
Mr. & Mrs. Robert Lockhart
Trigueros Wedding Logo
I created two versions. I liked the hand drawn feel of the printed one but Mr. T liked the finished feel of the script one so we went with it. I think we made the right choice.
Trigueros Wedding Cake
I saw this cake on Pinterest and knew I wanted it even before I knew I was getting married.
Actually, it was the first (probably only) element that was set in place from the beginning and never changed. Thanks to this tutorial, and the mad skills of Veronica at Veronica's Cakes I got this beautiful cake. She got the color just right and I hear it tasted divine, neither John nor I got a single taste. Hopefully we wrapped the top layer well enough that it will still taste good on our first anniversary.
To make the topper, I printed our logo on a sheet of clear, sticky inkjet paper then adhered it to a piece of cardboard that I found at work. I cut a bamboo skewer in half and put the two pieces in one of the corrugate channels and stuck it on top of the cake.


No comments:
Post a Comment